Get Ready for Cooler Weather with a DIY Wall-Mounted Coat Rack

As a DIY home crafter, you are always looking for new home improvement projects and craft ideas to tickle your creative senses and produce something that can improve your lifestyle. This winter, one of the best DIY home projects that you can complete in just a few hours of work is the wall-mounted coat rack.
As winter's chill grows, it is important to remember that we will be spending more time indoors and, when we are outdoors, more time wrapped in thick winter coats. Because of this, one of the best (and most stylish) projects for this winter is a DIY wall-mounted coat rack.
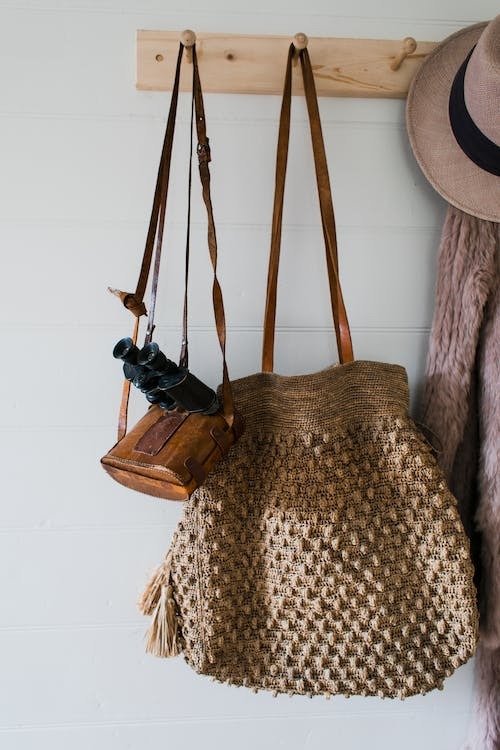
Wall-mounted coat racks are a great addition to any home because they do not take up much space, are fun to build, and can easily be removed without any damage to your walls. In addition, they also offer an elegant and efficient way to hang up your winter coats or snow pants when you come inside after a cold, blustery day.
In this post, we are talking about all things DIY wall-mounted coat racks. We will tell you the materials you need and give you a step-by-step guide to build a wall-mounted coat rack at home. This project is perfect for the whole family. Keep reading to learn more!
Materials Needed
When getting ready for cold weather, having a wall-mounted coat rack can be a convenient and efficient way to organize your coats, jackets, and other outerwear. These coat racks not only save space in your coat closet but also serve as a stylish décor piece for your living spaces. To create your own DIY wall-mounted coat rack, you will need a few materials.
- First, you will need shaker pegs from Midwest Dowel. This will provide the thickness you need, and you will be able to insert your shaker pegs into your base board. You can order them online and have them shipped directly to your door.
- Next, you will need a sturdy base for your coat rack. This can be a wooden board or a piece of reclaimed wood for a more rustic look. Ensure that the board is wide enough to accommodate multiple hooks and strong enough to hold the weight of several coats. Most crafters will use a piece of wood that is two or three feet long, but if you find a few smaller pieces of stylish wood to use, you can always attach a single hook to multiple pieces of wood and then stagger your hooks throughout your wall.
- Attach the coat hooks to the base, you will need screws and drywall anchors. The screws will provide a strong attachment point, while the drywall anchors are essential for stability if you are mounting the coat rack on drywall.
- Lastly, gather any additional materials you may need, such as a tape measure for precise placement of the hooks, a drill to create pilot holes, and a screwdriver to secure the hooks in place.
You can also, of course, add anything you want to your wall-mounted coat rack. You can do things like paint your wood to a preferred color or add multiple hooks to your wood base. Whatever you choose to do is up to you and will help make the wall-mounted coat rack perfect for you and your home.
What are the different kinds of spindles and pegs? Learn more here!

Customization Tips
The best part about making DIY home crafts is that you can customize the projects to fit your needs and preferences. Here are some tips to help make the wall-mounted coat rack your own.
- Add a Shelf: If you want to maximize your storage space and add a functional element to your coat rack, consider adding a shelf. This can be a great spot to place decorative items, store your keys, or even keep a small plant. Simply attach a wooden board or a premade shelf to the top of your coat rack and secure it with screws.
- Paint or Stain: Personalize your coat rack by adding a pop of color or a touch of elegance with paint or stain. Choose a shade that complements your existing decor or go for a bold, statement color. You can also use a stain to enhance the natural wood grain and give your coat rack a more rustic feel.
- Hang Artwork or Photos: Turn your coat rack into a gallery wall by hanging small pieces of artwork, family photos, or motivational quotes. This adds a personal touch to your coat rack and makes it feel like a special part of your living space.
- Include Shoe Storage: If you have limited space in your entryway, consider adding a shoe rack or shoe bench beneath your coat rack. This provides a convenient spot to store your shoes and keeps them organized and easily accessible. Look for bench options with built-in baskets or wire mesh baskets for easy shoe storage.
With these customization tips, you can create a unique and functional wall-mounted coat rack that not only serves as a practical storage solution but also adds a touch of style to your home. You don't want just any wall-mounted coat rack. You want a coat rack that is unique to you and your home.
Looking for more home décor ideas using wooden dowels? Check out this blog!
Wood Dowels for Your Home Projects from Midwest Dowel
There are so many home projects that can enhance your home and add a touch of style and personality to your established decor. The DIY wall-mounted coat rack is just one project that can help make your life easier and make storage of winter coats a breeze. It is also a fun project that you will enjoy completing with the whole family.
All great home DIY projects start with wood components you can count on. But who wants to run out in the slush and cold of winter? Shop online with Midwest Dowel and have all the wood components you need, shipped directly to your doorstep.
Check out our wide selection of dowels and wooden components to get you started on your next great DIY project. Click here!
Looking for more tips and tricks on spindles, pegs, and other components? Follow Midwest Dowel on Facebook, Instagram, Twitter, and Pinterest!
Happy with the difference Midwest Dowel has made for your home woodworking projects? Leave us a quick five-star review here!


